
Self Sustaining Aquarium Ecosystem Quick Start Guide
A self-sustaining aquarium ecosystem taps into nature’s own recycling. By growing algae, fostering beneficial bacteria, and introducing microfauna, you lay the groundwork for a saltwater habitat that practically manages itself.
Understanding Self Sustaining Aquarium Ecosystem
For a truly closed-loop system, three elements must work in concert: a well-planned refugium, vibrant pod cultures, and an efficient nutrient cycling process to keep nitrogen and phosphate levels in check.
These are the levers you’ll adjust early on:
* Proper refugium lighting to fuel macroalgae and phytoplankton growth.
Balanced flow rates that encourage bacterial colonies without flushing out pods.
A refugium sized to about 20% of your display volume for maximum biodiversity.
Nature’s cleanup crew operates on simple principles:
* Algae absorb excess nitrates and release oxygen.
Beneficial bacteria convert toxic ammonia into usable nitrates.
Copepods and small shrimp break down detritus and polish the substrate.
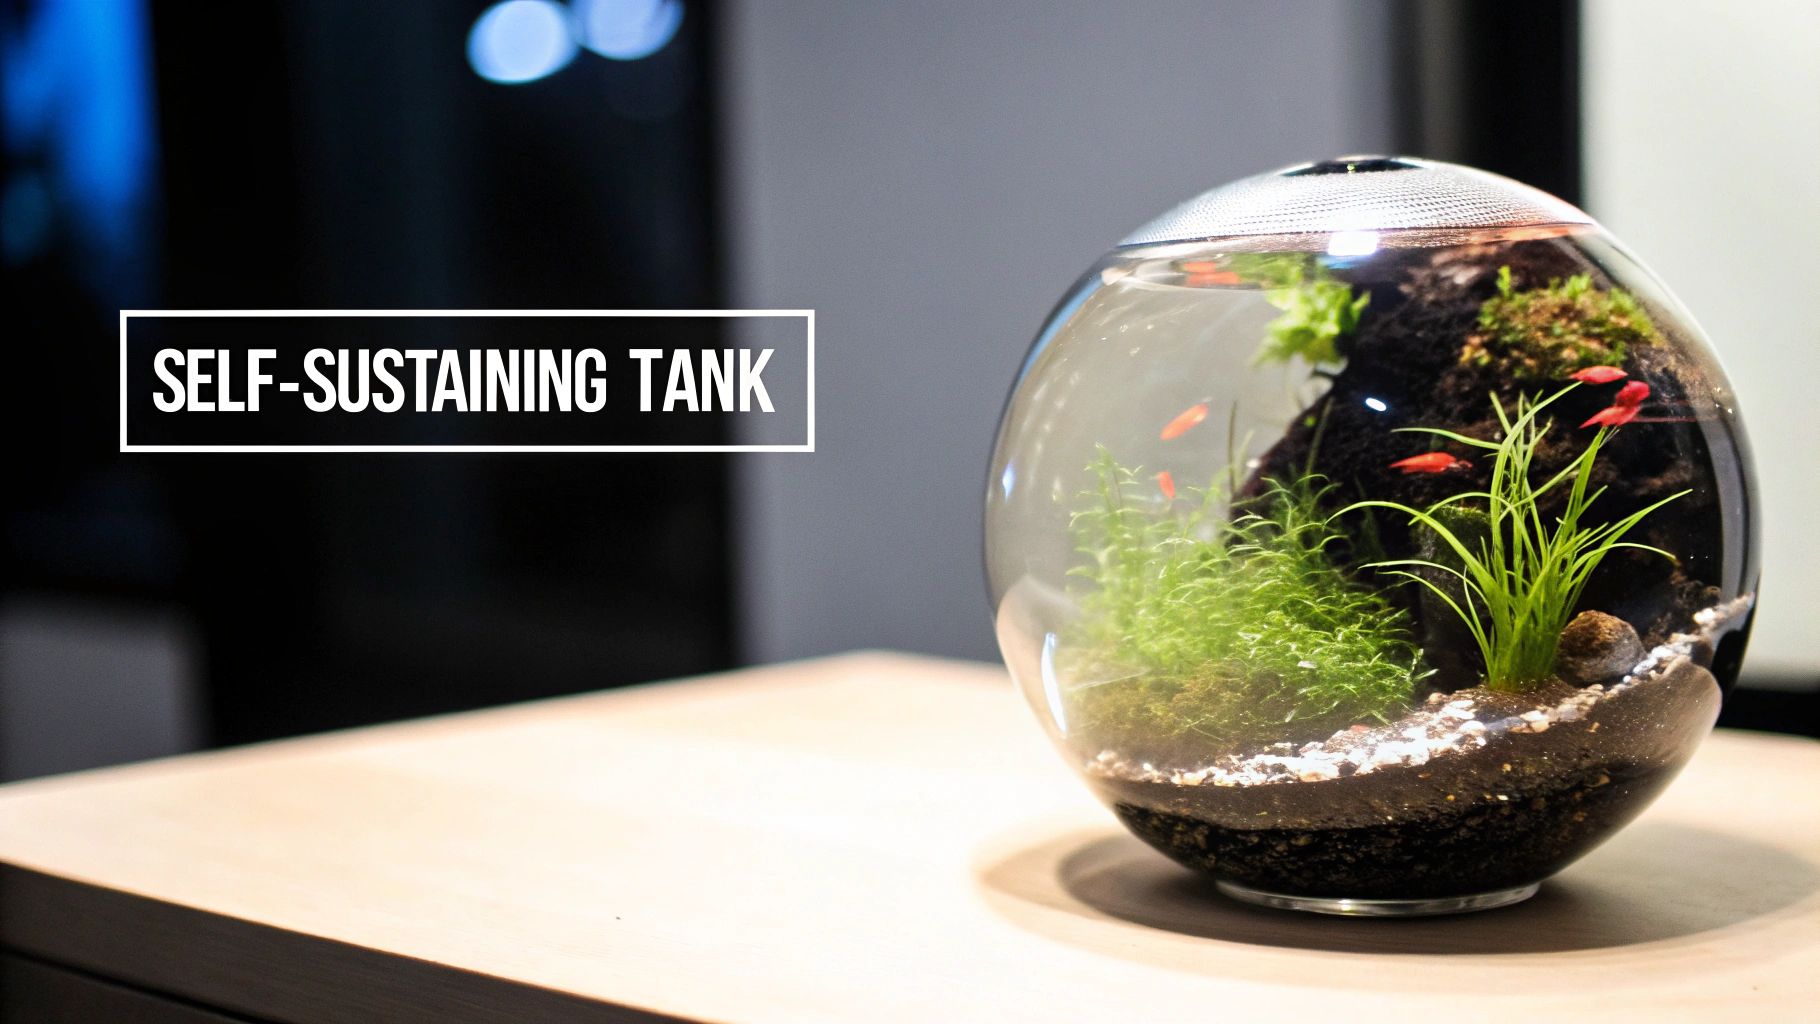
You don’t have to imagine the results—look at the sealed EcoSphere. Once sealed with water and brine shrimp, it can cruise along for years on light alone. Learn more about the EcoSphere on Wikipedia).
Core Components And Balance
A robust system hinges on matching filtration capacity to tank volume and livestock choices. Oversizing pumps or skimping on refugium space can throw off the balance—and your nutrient readings will tell the tale.
Schedule equipment upgrades and cycling milestones so you never overload your biofilter. Patience here pays dividends down the road.
Minimal inputs and precise lighting fuel a harmonious, long-term balance between algae, bacteria, and pods.
Keep these core concepts in mind, and you’ll build confidence in designing a low-maintenance saltwater setup that thrives year after year.
Practical Planning Steps
- Work out your total tank volume and size your refugium at roughly 20% of that number.
- Seed your system with a measured starter of live pods—run a small test batch to gauge how fast they multiply.
- Introduce PodDrop Live Aquarium Nutrition to kick-start copepod and phytoplankton populations.
- Allow 4 to 6 weeks for bacterial colonies and algae mats to establish before adding sensitive livestock.
Key Takeaways
- Minimal feeding curbs nutrient spikes.
- Microfauna populations self-regulate over time.
- A consistent lighting schedule is crucial for refugium growth.
Master these steps, set realistic expectations, and you’ll soon enjoy a self-sustaining aquarium ecosystem that practically runs itself.
Choosing Your Aquarium System
Picking the right tank and gear is easily the most critical decision you'll make when building a self-sustaining aquarium. Your physical setup—from the glass box itself to the pumps and lights—is the foundation that dictates the stability, how much work you'll be doing, and ultimately, the success of your little piece of the ocean. It really sets the stage for everything else.
The first question is usually about size. A lot of hobbyists get drawn to those slick nano reefs, often under 20 gallons. They look amazing and fit just about anywhere, but that small water volume is a double-edged sword. It makes them incredibly sensitive. A tiny mistake, like one extra pinch of food, can send your water parameters into a tailspin. They demand a delicate touch and constant attention to keep things balanced.
On the flip side, mid-size display tanks, typically in the 40 to 75-gallon range, are far more forgiving. The larger volume of water acts as a massive buffer, diluting waste and making the whole system more resilient to small mistakes. If you're just starting out and aiming for a self-sustaining setup, a bigger tank gives you a huge advantage and a much wider margin for error.
Comparison Of Aquarium System Types
To help you figure out what's best for you, let's break down the most common options side-by-side. Each one has its own set of demands and rewards, making one a better fit depending on your goals, available space, and experience level.
| System Type | Volume Range | Maintenance Level | Ideal Inhabitants |
|---|---|---|---|
| Nano Reef | 5 - 20 Gallons | High | Hardy microfauna, small gobies, soft corals |
| Mid-Size Reef | 20 - 75 Gallons | Moderate | Diverse fish, corals, robust pod populations |
| Aquaponics | 40+ Gallons | Low (once stable) | Nutrient-tolerant fish, macroalgae, invertebrates |
Integrated aquaponics systems offer another fascinating route. These setups connect the aquarium to a hydroponic grow bed where plants literally eat the fish waste for fertilizer. This naturally purifies the water, creating a powerful symbiotic loop that can slash the need for water changes.
The goal isn't to find the "best" tank, but the best tank for you. It’s all about balancing your space, budget, the livestock you dream of keeping, and how much time you can realistically dedicate.
Budgeting for Long-Term Success
When you're mapping out your budget, it pays to invest in reliable core components. Don't skimp on a quality return pump or a dependable heater—if either of these fails, it can spell disaster in a hurry. Energy-efficient LED lighting is another area where spending a bit more upfront pays dividends through lower electricity bills and healthier coral or macroalgae growth.
You can often save some money initially by holding off on fancy automation and controllers. While they’re nice to have, they aren't essential for getting a stable ecosystem up and running. You can always add those bells and whistles later as your budget allows and you get a better feel for your tank's unique rhythm. For more detailed advice, check out our practical guide on how to set up a new aquarium.
This whole approach is part of a growing trend toward more sustainable reefing. Industry reports show the global aquarium market is expanding, with a whopping 72% of hobbyists now using self-sustaining or low-maintenance setups. This shift is fueled by better, more energy-efficient lighting and integrated aquaponics technology. By choosing your system with care, you’re not just creating a beautiful display—you’re joining a community dedicated to responsible, balanced reef-keeping.
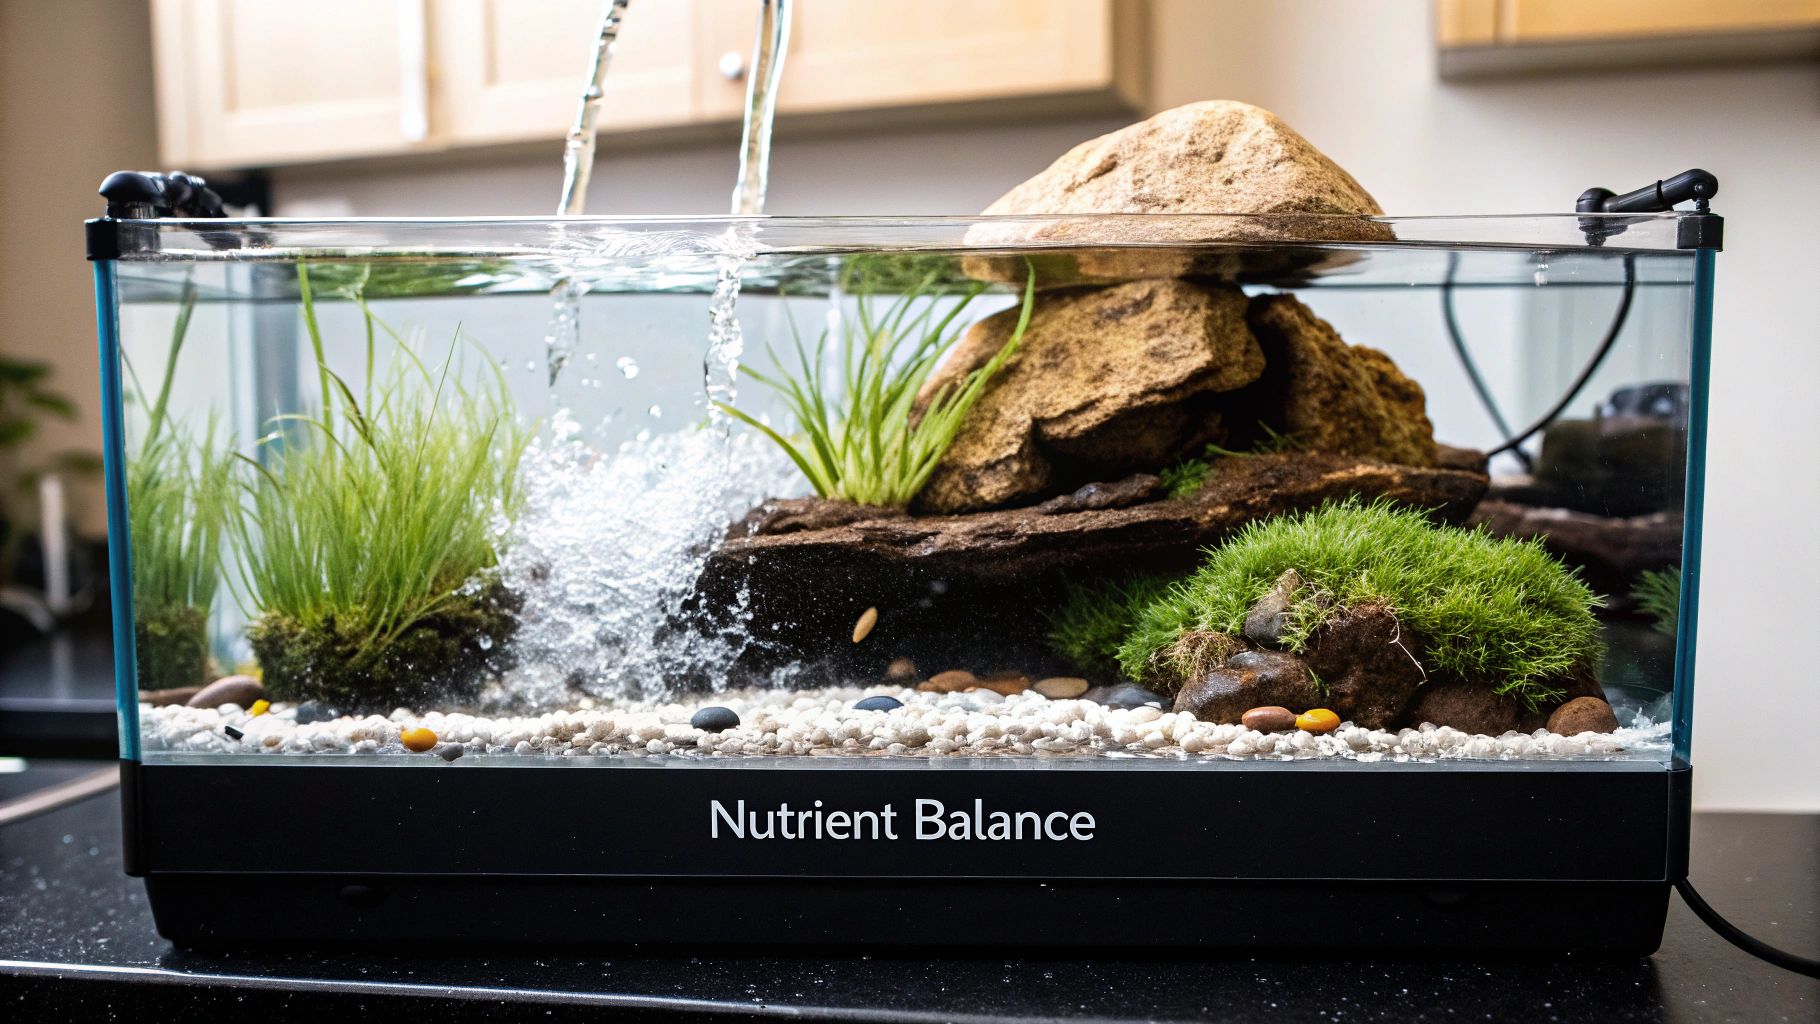
Creating Nutrient Balance With a Refugium and Live Pods
The secret to a thriving, low-intervention reef tank? It's all about building a reliable nutrient loop. This is where a refugium packed with macroalgae and live pods becomes your best friend.
Think of this combo as a living filtration layer. It actively handles waste and recycles key elements, doing the heavy lifting for you.
- Nitrate removal: Macroalgae soaks up nitrates, preventing nasty spikes and keeping your water crystal clear.
- Detritus breakdown: Copepods act like a microscopic cleanup crew, munching on organic debris before it can foul the water.
- Trace element recycling: Phytoplankton helps cycle essential elements back into the system, feeding corals and other invertebrates.
Copepod cultures are your tiny janitors, constantly grazing on detritus and any uneaten fish food. At the same time, macroalgae like Chaetomorpha absorb dissolved nutrients before they can fuel nuisance algae blooms. It's a perfect partnership.
Understanding Pod Population Modeling
Getting a handle on how quickly your pod population will grow helps you stay ahead of nutrient swings. You don't need complex math; a basic model using a starting count, reproduction rate, and time is all it takes.
For instance, copepods can reproduce incredibly fast. A starting culture of just 100 pods with a doubling time of 3 days can explode to over 1,600 in just two weeks.
| Tank Volume | Initial Pods | Pods After 2 Weeks |
|---|---|---|
| 5 gallons | 50 | 800 |
| 20 gallons | 200 | 3,200 |
| 50 gallons | 500 | 8,000 |
This table is a great starting point for figuring out your initial seeding amount. The goal is to avoid having too many pods for the available food or too few to make an impact. Use this data to strike a balance where your copepod population stays in check with the nutrient uptake of your macroalgae.
Refugium Seeding And Lighting
Once your tank's water parameters have stabilized, it's time to seed the refugium. This is as simple as adding your live macroalgae and pod cultures.
For lighting, you don't need a high-powered fixture. A gentle light running for 6 to 8 hours a day is plenty to encourage steady macroalgae growth without going overboard.
Don't forget the substrate. A coarse sand bed is perfect, as it gives pods plenty of nooks and crannies to graze in while also helping to trap detritus for them to eat.
Getting started is straightforward:
1. Set up your refugium, aiming for about 20% of your display tank's volume.
2. Place your macroalgae in the refugium, using sealant weights or small rocks to anchor it.
3. Introduce your live pods. Giving them a boost with a product like PodDrop can help jumpstart the population.
4. Set your flow rate. You're looking for gentle circulation, about 10-20× the refugium's volume per hour.
Research from major closed-loop projects like Biosphere-2 has shown just how crucial fully recyclable resources for carbon, nitrogen, and phosphorus are for the long-term stability of aquatic ecosystems. You can dive deeper into the science behind nutrient cycling in closed-loop ecosystems to see why this approach is so effective.
A great way to keep your copepods well-fed without adding nitrates is to introduce a continuous, low-level dose of phytoplankton.
This image gives you a good idea of a typical refugium setup. You can see the macroalgae, the flow path, and how the lighting is positioned. Placing the refugium under the display tank is a popular method because it makes for easy, gravity-fed water return and simplifies maintenance access.
Substrate And Flow Optimization
The right substrate mix can create a perfect micro-habitat for your pods. I've had great success with a mix of different grain sizes of sand combined with aragonite.
Your flow settings are just as important. You want enough current to gently tumble the macroalgae and stir up detritus, but not so much that it rips the algae apart or blasts the substrate away.
- Fine sand pockets create areas where detritus settles, providing a consistent food source for pods.
- Aragonite grit helps buffer your pH and provides more surface area for beneficial bacteria.
- Try orienting your return jets to create a gentle, sideways flow across the entire refugium.
After you harvest some macroalgae, take a look at the substrate. It should have a light dusting of debris, but it shouldn't look like a cemented mat. If you notice the sand starting to compact, just gently stir it with a pipe cleaner once a month.
Monitoring Flow And Chemistry
Consistency is key. You want to make sure your flow is reaching every corner of the refugium, leaving no dead zones where waste can accumulate.
Give your flow rates a quick check every week. In larger systems, a smooth current of around 500–800 GPH is a good target.
You'll also want to keep an eye on a few key water parameters. Simple test kits for nitrate, phosphate, and pH are all you need.
- Nitrates: Test twice a week for the first month to see how your refugium is performing.
- Phosphate: Check this every couple of weeks to stay ahead of any unwanted algae.
- pH: Record your pH daily until you see it stabilize within the ideal 8.1 to 8.3 range.
Adjusting Parameters As The System Matures
As your macroalgae grows and fills in, you'll notice its nutrient uptake really starts to ramp up. The detritus level will drop as the hungry copepod population expands.
This is when you can start to scale back on phytoplankton dosing. Keep an eye on the pod density—you can use a flashlight at night or a simple counting grid to get a rough idea.
If your nitrates fall too low (below 2 ppm), that's a sign your system is running too efficiently. Simply reduce how often you harvest the macroalgae to keep things in balance. I know one hobbyist who saw a 40% drop in nitrates just three weeks after adding Chaetomorpha and PodDrop to his refugium.
Integrating Macroalgae Best Practices
For a deeper dive into choosing the right macroalgae and keeping it healthy, check out our A Guide to Marine Aquarium Macroalgae.
By making these simple refugium checks part of your regular schedule, you'll find your water chemistry stays incredibly stable with far fewer water changes. A little fine-tuning of your lights, flow, and feeding is all it takes to help your self-sustaining ecosystem flourish.
Sampling And Data Logging
Taking regular notes might seem tedious, but it's the best way to spot trends before they become problems. A simple spreadsheet or a dedicated app is perfect for logging your key metrics.
- Date, time, and water temperature
- Nitrate, phosphate, and pH readings
- Quick notes on macroalgae health or pod activity
Reviewing these logs once a month can reveal subtle shifts, allowing you to make small, proactive adjustments. Now, you can sit back and enjoy watching your beautiful, balanced ecosystem come to life.
Selecting Livestock And Phytoplankton Cultures
The long-term success of your self-sustaining ecosystem really hinges on the inhabitants you choose. This isn't just about picking pretty fish; it's about building a functional team where every member has a role in processing nutrients, tackling waste, and keeping algae in check. Getting this mix right from day one will save you countless headaches down the road.
Your cleanup crew is the foundation. These are the unsung heroes working 24/7 to break down detritus and graze on algae before it ever becomes a problem. Instead of just buying a generic "reef cleanup crew" package online, think about the specific jobs that need doing in your tank.
- Substrate Sifters: Malaysian Trumpet Snails (MTS) are fantastic for keeping the sand bed aerated, preventing nasty anaerobic gas pockets from building up. They burrow during the day and come out at night, constantly turning things over.
- Detritus Eaters: Halocaridina rubra, the little Hawaiian red shrimp also known as ʻōpaeʻula, are incredibly hardy and have a tiny bioload. They thrive in sealed ecosystems and spend their time picking at biofilm and tiny leftovers.
- Algae Grazers: You can't go wrong with species like Trochus and Cerith snails. They're excellent at handling film algae on rocks and glass, and they can get into tight crevices that other grazers miss.
Designing Your Livestock Roster
When it comes to picking fish, always prioritize species with a low bioload and a peaceful temperament. A classic choice for smaller, self-sustaining setups is a pair of small gobies, like the vibrant Yellow Clown Goby. They are completely reef-safe, add a brilliant splash of color, and have a minimal impact on your nutrient levels.
If your system is a bit larger, a Royal Gramma or a Firefish can be a wonderful addition. But always, always research compatibility to avoid aggression, which can throw the entire system into a state of stress. Overstocking is the single fastest way to crash your carefully balanced environment.
A common rule of thumb is one inch of adult fish per five gallons of water. Honestly, in a self-sustaining system, I'd be even more conservative. Aiming for one inch per seven to ten gallons gives your biological filter plenty of breathing room.
This cautious approach ensures your pod populations and macroalgae can easily keep up with the waste being produced, maintaining that all-important nutrient balance.
Sourcing and Introducing New Arrivals
Where you get your livestock is just as critical as what you choose. Reputable suppliers provide healthy, disease-free animals. I always look for vendors who specialize in aquacultured species—they tend to be hardier and, importantly, reduce the impact on wild reefs. This goes for your live rock and starter cultures, too.
Quarantine is absolutely non-negotiable. Every single new addition—fish, coral, snail, or shrimp—must spend at least four weeks in a separate quarantine tank. This is your single best defense against introducing devastating pests like ich or Aiptasia into your pristine ecosystem. It might seem like a hassle, but it's a tiny price to pay for long-term stability.
Once quarantine is over, introduce new inhabitants slowly. Add one fish or a small group of invertebrates at a time, then wait a week or two before adding anything else. This gives your biological filter the time it needs to adjust to the increased bioload, preventing dangerous ammonia or nitrite spikes.
The Role of Phytoplankton Cultures
Finally, don't overlook the power of phytoplankton. Dosing live phytoplankton is a two-for-one punch: it directly feeds your copepods, guaranteeing a robust and self-renewing population, and it also provides fantastic supplemental nutrition for many corals and filter-feeding inverts.
The strain you choose really matters. Nannochloropsis is a great all-around choice for boosting pod populations, while a strain like Isochrysis is prized for helping enhance coral coloration. In my experience, using a blend provides the most comprehensive nutritional benefits.
You can easily set up a small station to grow your own supply, which is a super cost-effective way to provide this essential food source. For any dedicated hobbyist, learning how to culture phytoplankton for your reef tank is a game-changing skill. A consistent supply ensures your microfauna never goes hungry, fortifying the entire food web from the bottom up.
Nailing Down a Practical Maintenance Routine

Let’s clear something up right away: "self-sustaining" is a bit of a misnomer. It doesn’t mean "no-maintenance"—it means "less intensive maintenance." Once your system finds its equilibrium, your job isn't constant meddling. Instead, you become a careful observer, a fine-tuner.
The key to keeping your tank stable for the long haul—without the hobby feeling like a second job—is a consistent and practical maintenance schedule. We're aiming for a rhythm of small, manageable tasks. This approach nips tiny issues in the bud before they can snowball into full-blown tank emergencies.
The Five-Minute Daily Check-In
Your daily once-over should be faster than making a cup of coffee. Think of it as your first line of defense.
- Do a Headcount: Take a quick look at your fish and inverts. Is everyone present and accounted for? Are they acting normally, or is someone hiding or looking stressed?
- Check the Tech: A quick glance at your pumps, heater, and lights is all it takes. Is everything humming along as it should? No weird noises? Make sure you see good flow from the return pump into the display.
- Scan for Trouble: Look for any new spots of nuisance algae on the glass or rocks. Peek into the refugium—how are your macroalgae looking? Healthy and vibrant?
This simple routine helps you build an instinct for what "normal" looks like in your tank. That baseline is gold when it comes to spotting trouble early.
A seasoned reefer once told me, "The best tool in this hobby is a comfortable chair in front of your tank." He was right. Daily observation is incredibly powerful; it lets you catch problems when they're still small and easy to fix.
Your Weekly Water and System Review
Set aside about 20-30 minutes a week, maybe on a Saturday morning, to dig a little deeper. This is where you gather the data that informs your bigger-picture management.
Testing key water parameters is the main event here. For a system like this, you really want to keep an eye on:
- Nitrate: This tells you how efficiently your refugium is gobbling up waste. A stable reading between 2-5 ppm is a fantastic target.
- Phosphate: Keeping this low is your secret weapon against algae blooms. Aim to keep it below 0.05 ppm.
- Alkalinity (dKH): This is absolutely vital for coral health and pH stability. Consistency is the name of the game, but a range of 8-11 dKH is the sweet spot.
- Salinity: Grab your refractometer and check the salt level. Top off any evaporation with fresh RODI water to keep the environment stable.
While you're at it, give the glass a good scrape to remove any film algae and empty the cup on your protein skimmer if you have one. This is also the perfect time to check on your pod population. After the refugium lights go out, shine a flashlight in there—you should see them scurrying all over the glass and substrate.
Monthly and Quarterly Deep Dives
Your longer-term tasks are all about preventative maintenance on your equipment. Keeping your gear running smoothly is crucial for system stability.
Monthly To-Do's (About 45-60 minutes):
* Harvest Macroalgae: It's time for a haircut. Trim back about 30-50% of the macroalgae in your refugium. This physically removes all the nutrients the algae absorbed from the water.
* Clean Your Pumps: Take apart your return pump and any powerheads for a good cleaning. Biofilm and gunk can build up, hurting their efficiency and shortening their lifespan.
* Check Your Reagents: Take a look at the expiration dates on your test kits. Using expired reagents can give you bogus readings, leading you to make the wrong adjustments.
Quarterly Tasks (About 1-2 hours):
* Full Gear Inspection: Do a thorough check of all your equipment. Inspect wiring for frays, tubing for kinks, and seals for any signs of salt creep or leaks.
* Light Substrate Siphoning: Gently siphon a small patch of the sand bed in your display tank to pull out any detritus that's settled. Don't go crazy—deep vacuuming can wipe out the beneficial microfauna living in the sand.
To make things easier, here’s a straightforward schedule you can follow. You might even want to print it out and stick it on your aquarium stand as a reminder.
Maintenance Task Schedule
| Frequency | Task | Tools Needed | Purpose |
|---|---|---|---|
| Daily | Visual inspection & livestock check | Your eyes | To spot immediate issues like sick fish or equipment failure. |
| Weekly | Water parameter testing, glass cleaning | Test kits, refractometer, algae scraper | To monitor chemical stability and prevent algae buildup. |
| Monthly | Harvest macroalgae, clean pumps | Scissors, pump cleaning brushes | To export nutrients and maintain equipment efficiency. |
| Quarterly | Full equipment inspection, light siphoning | Screwdriver, siphon hose | To ensure long-term reliability and proactive problem prevention. |
Following a simple, structured routine like this is what turns your self-sustaining aquarium from a source of stress into a source of pure relaxation and enjoyment.
Troubleshooting Common Aquarium Challenges
Even the most carefully planned self-sustaining aquarium can hit a bump in the road. It happens. The goal isn't to prevent every single problem—that’s impossible. The real skill is learning to diagnose them quickly and apply targeted fixes that bring things back into balance without crashing the entire system.
You need to think like an ecosystem detective, reading the signs your tank gives you.
Sudden algae blooms, for instance, are almost never a random event. They're a flashing neon sign screaming "excess nutrients!" Before you even think about reaching for a chemical additive, put on your detective hat and investigate the root cause. Did you recently start feeding more heavily? Did a snail or shrimp die somewhere you can't see?
Often, the simplest fix is the best. Try cutting your feeding schedule in half for a week or harvesting a bit more macroalgae from your refugium. Starving the bloom out is far more effective and sustainable than a chemical quick-fix.
Diagnosing Water Clarity And Chemistry Swings
Cloudy water is another one of those common red flags that sends new hobbyists into a panic. If it's a milky white haze, you’re almost certainly looking at a bacterial bloom. This is super common in new tanks or after something big changes, like adding a lot of new rock, which can disrupt your biological filter.
The best course of action? Patience. Just let the beneficial bacteria populations sort themselves out and re-establish their dominance. Whatever you do, resist the temptation to perform a massive water change; it often just prolongs the problem.
Green water is a different beast entirely. That points directly to a free-floating algae problem, usually fueled by a nasty combo of excess phosphates and nitrates, plus too much light.
Here’s a quick troubleshooting checklist:
- Test your source water. Phosphates can sneak into your system through top-off water, especially if your RODI filters are getting old.
- Dial back your lighting. Try reducing the time your main display lights are on by an hour or two each day until you see the water start to clear.
- Supercharge your nutrient export. Take a good look at your refugium. Is it really running at its best? Sometimes a simple tweak, like adjusting the flow or upgrading the light over your macroalgae, can make a world of difference.
A sudden, unexplained pH swing is one of the most urgent alarms your tank can sound. Don't just correct it with buffers; investigate why it happened. Low pH can often be traced back to poor surface agitation, which prevents proper gas exchange and allows CO2 to build up in the water.
Responding To Population Crashes
What about the little guys? If you suddenly notice a steep drop in your copepod or amphipod population, that's a massive warning sign that something is fundamentally wrong within your self sustaining aquarium ecosystem. The cause could be a hidden predator you didn't know you had, but more often, it's a sudden collapse of their food source.
Let's look at a real-world scenario. A fellow reefer had a heater malfunction in his refugium, which wiped out his entire crop of chaetomorpha. The resulting nutrient spike was manageable, but his pod population crashed because their primary habitat and food source vanished literally overnight.
He saved the system with a few quick, decisive actions. He performed a small 20% water change, reseeded the 'fuge with fresh macroalgae, and added a new, vibrant culture of copepods from PodDrop Live Aquarium Nutrition. This rapid intervention prevented a full-blown catastrophe. Within a few short weeks, his cleanup crew was back and thriving again.
Frequently Asked Questions
Walking into a reef hobby can spark the same handful of doubts: how big should your tank be, when to feed those tiny pods, which critters really clean up waste, and how often to swap water. Nailing these details early makes for a smoother journey—and sets you up for a genuinely self-sustaining aquarium.
Below, you’ll find the questions I hear most often, paired with practical tips I’ve gathered over years of reef-keeping. Think of this as your go-to guide for building and maintaining a thriving saltwater ecosystem.
What Is the Minimum Tank Size for a Self Sustaining Aquarium Ecosystem?
You can run a true closed ecosystem in a 2–5 gallon pico reef, but only if you obsess over every detail—lighting, microfauna choices, nutrient dosing. That tiny volume leaves almost zero room for mistakes.
For most hobbyists, a 10 to 20-gallon display hits the sweet spot. The extra water acts like a shock absorber when parameters drift, and it gives you space for a refugium that really works as your natural filter.
How Often Should I Feed Live Pods?
Once your refugium is humming and copepod numbers climb, constant feeding isn’t necessary. A thriving pod population will graze on detritus and microalgae all day long.
I top them up twice a week with a pinch of high-quality phytoplankton or powdered rotifer food. That tiny boost keeps pods plentiful without sending nitrates through the roof. If your nitrate tests start creeping up, simply scale back the extras.
Supplement their diet—don’t replace it. Healthy pods become your best cleanup crew and a continuous live-food source for fish and corals.
Which Species Are Best for Natural Nutrient Control?
Creating a cleanup crew isn’t about dumping in random snails and shrimp. It’s about matching each niche with a proven performer. Here’s who I rely on:
- ʻŌpaeʻula (Halocaridina rubra): Ultra-hardy shrimp that shred detritus with virtually zero bioload.
- Malaysian Trumpet Snails: Natural substrate aerators, perfect for oxygenating sandbeds.
- Cerith & Trochus Snails: Film-algae specialists—ideal for keeping rocks and glass spotless.
- Copepod Blend: A mix of species that graze from sandbed to water column, tackling waste at every level.
- Chaetomorpha: Macroalgae superstar in your refugium; mops up nitrates and phosphates before nuisance algae can bloom.
When Should I Perform Partial Water Changes?
In a balanced, mature system, you may only need a 5%–10% water change each month. These small swaps aren’t about chasing nitrates (your refugium handles that); they replenish trace elements and clear out organics that pods and bacteria can’t process.
Always let your water-test results drive your schedule. If calcium, alkalinity, and trace levels stay steady, stick with minimal changes—any more can actually upset the equilibrium you’ve worked to build.
Ready to seed your ecosystem with top-tier live nutrition? Visit PodDrop for a full range of copepod cultures and phytoplankton blends. Build your reef’s foundation—one drop at a time.